Arrange sections and pages
Drag sections between columns and pages, add pages, and see the exact PDF page count.
By the end of this article your sections sit where you want them, across the pages you want, and you know the exact page count of the PDF.
Open the layout editor
Open your résumé and select Arrange sections under the section list.
If you have unsaved design changes, confirm that you want to save them first.
The page title reads Arrange sections followed by your résumé's name. The right side shows Exact PDF preview and Exact PDF · 2 pages, for example.
Move sections
In Resume sections on the left, drag a section into any column on a page.
To change the columns, drag a row from Page layouts onto a page: Full width, 2 columns or 3 columns.
Select + Add page to add a page. Select Delete row or Delete empty page to remove them.
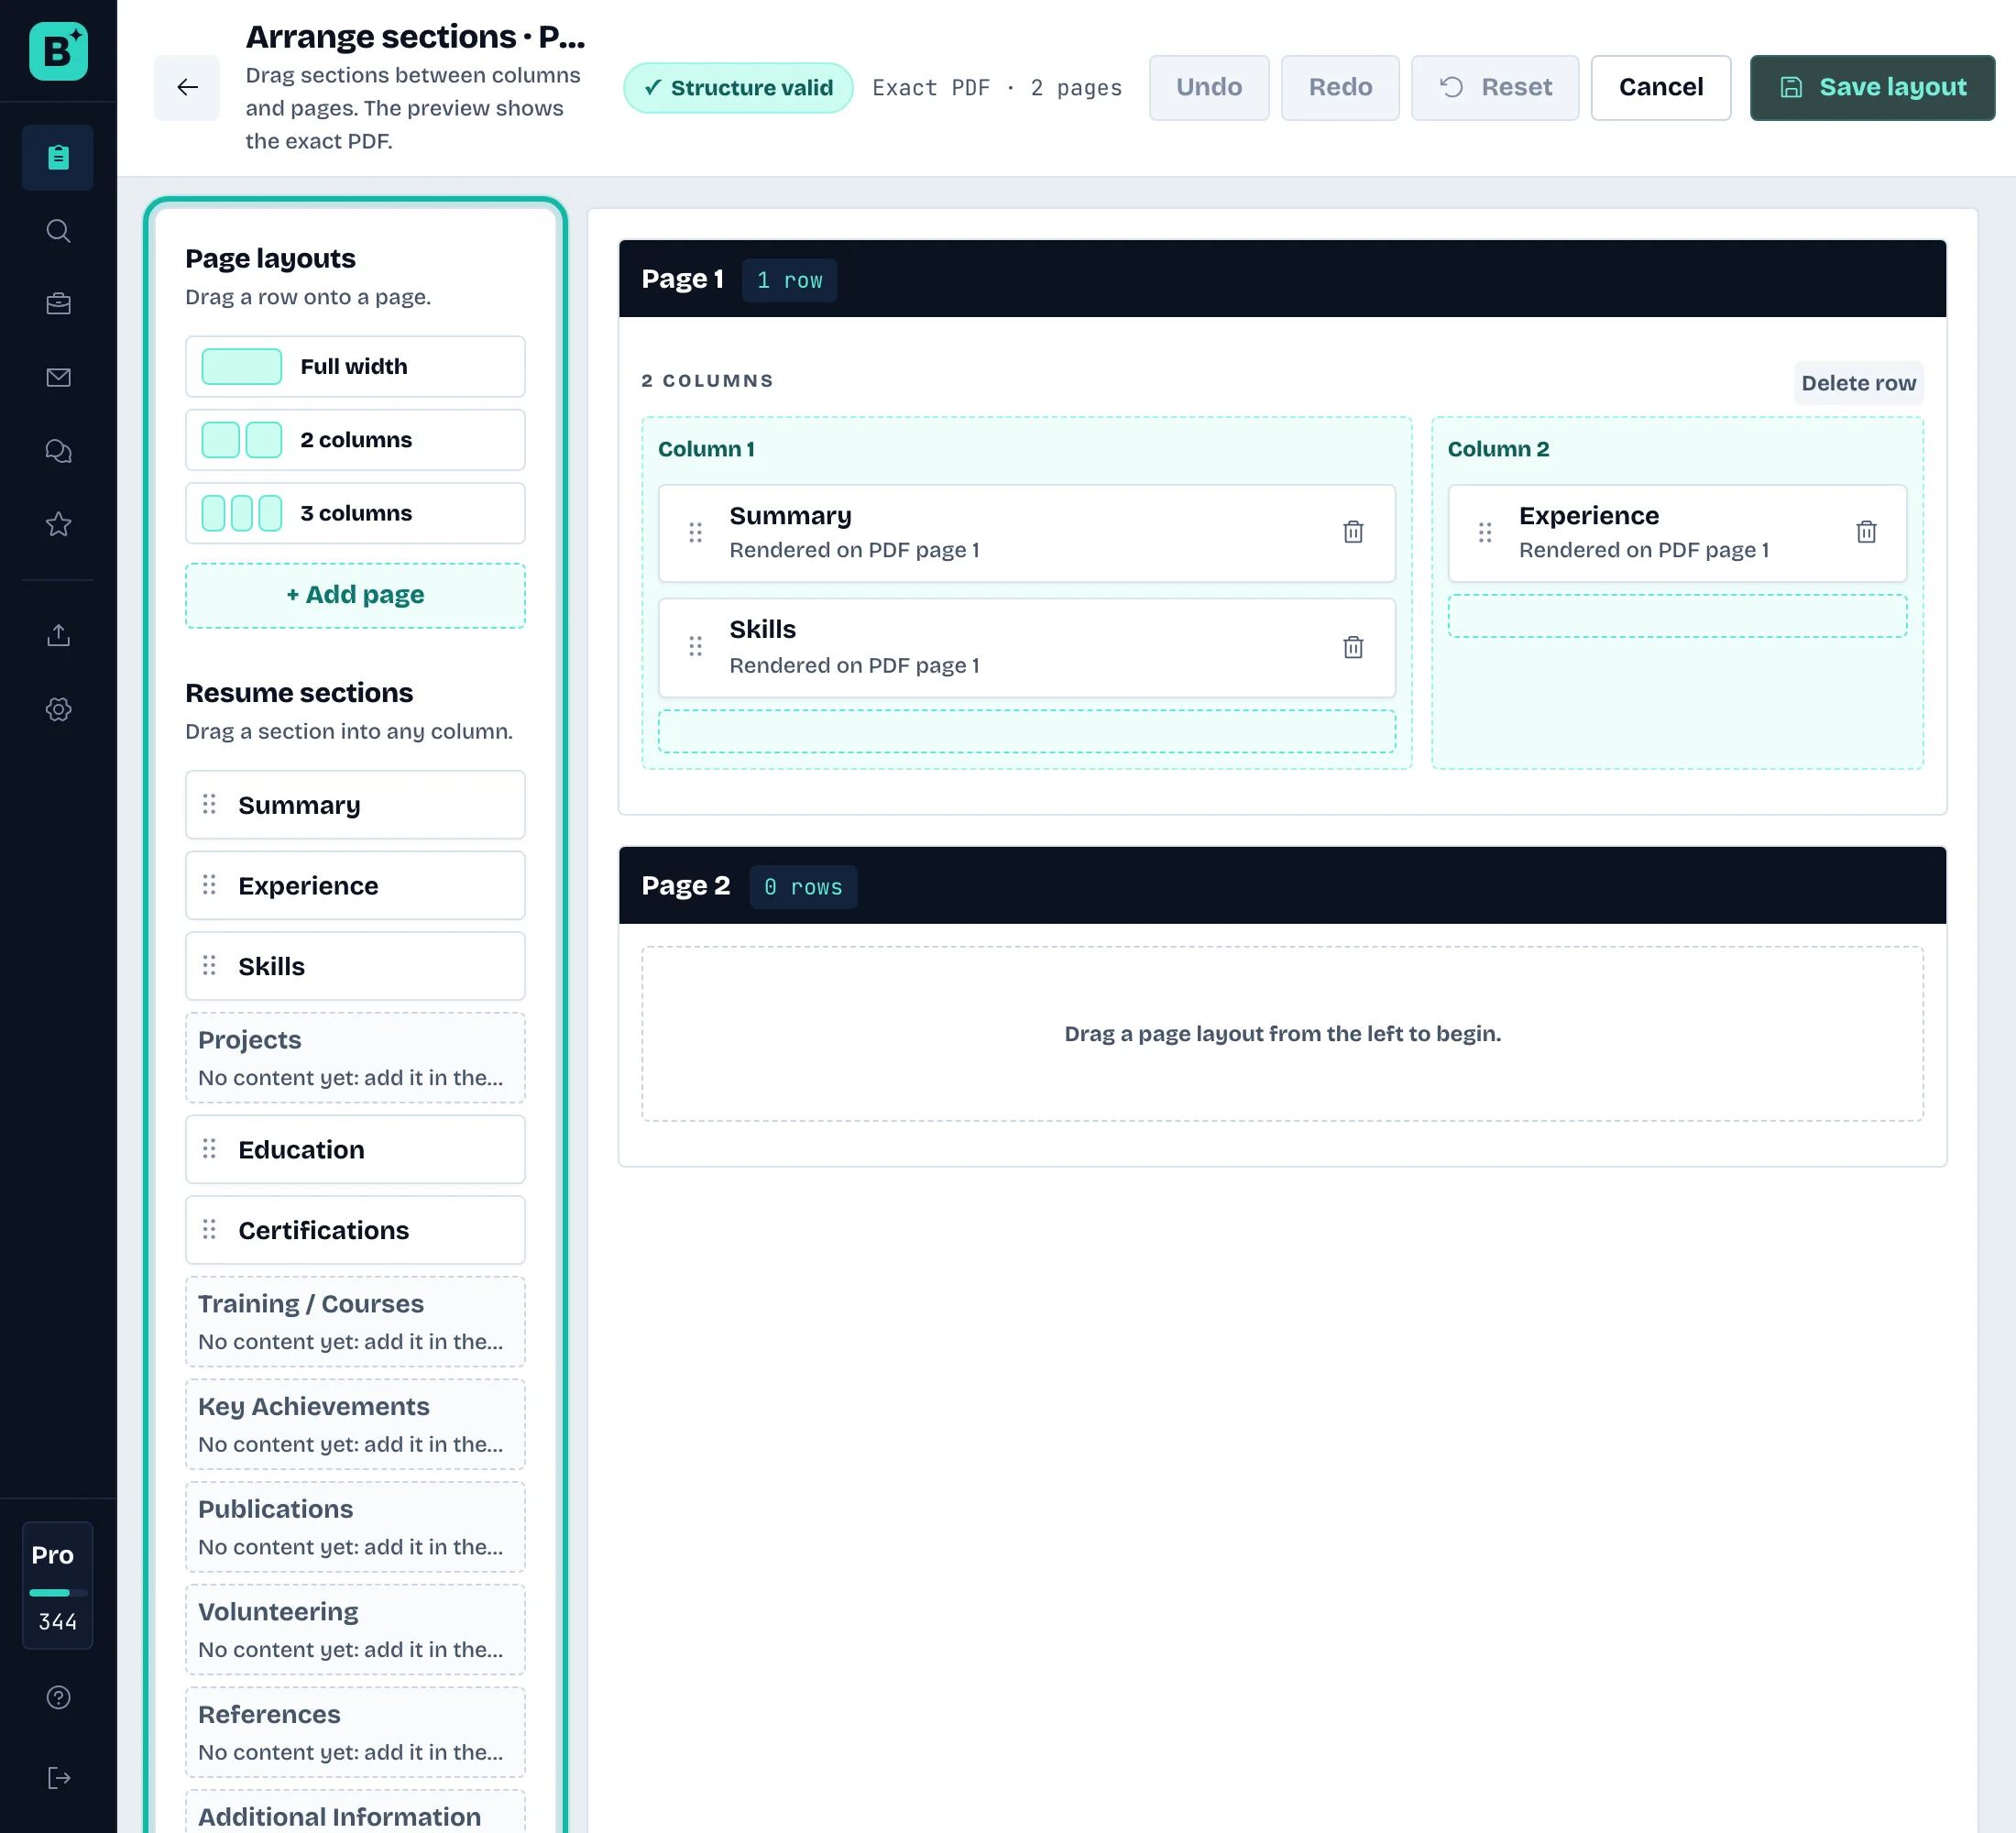
Use Undo, Redo or Reset if you change your mind.
Select Save layout.
What if…
A section is listed under "Not printed"? It is hidden in the editor or has no content. It keeps its place and prints once it has content and is shown.
The status says "structure errors"? Fix the row it points to, such as an empty row, before you save.
It says "PDF render failed"? Select Retry preview.
Saving says the résumé changed elsewhere? Select Reload latest version, then arrange again.
I want to leave without saving? Select Cancel, or the back arrow.
I only want a different look? See Choose a template and change styles.